A sharp knife is one of the most essential tools in any kitchen or outdoor setup. Whether you’re preparing food, camping, or hunting, a dull knife is not only inefficient but also potentially dangerous. Knowing how to properly sharpen a knife can make a world of difference, and in this guide, we will walk you through the best practices to sharpen your knives effectively.
Why Sharpen a Knife?
Before we dive into the methods, let’s first understand why sharpening a knife is essential:
Efficiency: A sharp knife cuts with ease, making your tasks quicker and more precise.
Safety: Contrary to what some might believe, dull knives are more dangerous than sharp ones. You need to apply more force, which increases the chance of the knife slipping.
Longevity: Regular sharpening helps preserve your knife’s blade edge, prolonging its lifespan.
Precision: Sharpening helps maintain a fine, controlled edge for better performance in tasks like slicing, skinning, or cutting.
Types of Knife Sharpening Tools
There are various methods and tools for sharpening knives, and the one you choose will depend on your preference and the tools you have access to. Here are some common options:
Sharpening Stone (Whetstone): A sharpening stone is one of the most traditional and effective ways to sharpen a knife. It uses abrasive materials like diamond or ceramic to grind and hone the blade edge.
How to Use: Soak the stone in water for 5-10 minutes (if it’s a water stone). Hold the knife at a 20-degree angle and slide it along the stone in a sweeping motion, ensuring both sides of the blade are sharpened evenly.
Pros: Offers precise control and can sharpen the blade to an incredibly fine edge.
Cons: Takes some practice and requires patience.
Honing Steel: A honing steel (or sharpening rod) is often confused with a sharpening stone, but it’s actually used to maintain the edge of a knife rather than remove material. Honing is typically done before you notice dullness to maintain sharpness.
How to Use: Hold the steel vertically, then place the knife at a 20-degree angle to the rod. Slide the knife down the steel in a sweeping motion from heel to tip, alternating sides.
Pros: Quick and easy to use.
Cons: Only works to maintain the edge and doesn’t restore a seriously dull blade.
Electric Knife Sharpener: Electric sharpeners are powered tools that can quickly sharpen knives. They use rotating abrasive belts or stones to grind the edge.
How to Use: Simply place the knife in the designated slot and follow the manufacturer’s instructions. Most electric sharpeners have multiple stages to fine-tune the sharpening process.
Pros: Fast and user-friendly.
Cons: Less control compared to manual sharpening, and it can remove more material than necessary if not used properly.
Manual Sharpening System: A manual sharpening system (like the popular Spyderco or Lansky systems) includes pre-set angles and a sharpening stone, often in a guided setup.
How to Use: Clamp the knife into the system and follow the included instructions for sharpening at the recommended angle.
Pros: More control than an electric sharpener and consistent sharpening angles.
Cons: Slightly more time-consuming and requires some learning.
Step-by-Step Guide to Sharpening a Knife with a Whetstone
Prepare Your Sharpening Stone: For a water stone, submerge it in water for about 10 minutes before use. For oil stones, apply a thin layer of oil to the surface.
Choose the Right Grit: If your knife is extremely dull, start with a coarse grit (around 400-600 grit). For knives with only minor dullness, start with a medium grit (around 1000-2000). For a fine, polished edge, finish with a high grit (around 3000-8000).
Find the Right Angle: Hold the knife at a 20-degree angle to the stone. This is typically the standard angle for most kitchen knives. Some knives may require a slightly more acute angle (e.g., 15 degrees for Asian-style knives).
Sharpen the Knife: Begin sharpening by placing the heel of the knife on the stone and gently pushing it away from you along the stone in a sweeping motion, from heel to tip. Make sure to sharpen both sides of the blade evenly. You’ll want to keep the same angle throughout the process.
Use Even Strokes: Repeat the sharpening motion around 5-10 times per side, ensuring that the blade makes full contact with the stone. If you’re using a coarse stone, you may need more strokes, while a finer stone will take fewer strokes.
Honing: After sharpening, use a honing steel to smooth out the edge and realign the blade’s microscopic teeth. Hold the knife at the same 20-degree angle and slide it down the steel 5-6 times on each side.
Test the Sharpness: Test the sharpness of your knife by carefully slicing through a piece of paper or a tomato. If it slices cleanly, the knife is sharp. If not, you may need to repeat the sharpening process.
Tips for Effective Knife Sharpening
Don’t Overdo It: Sharpen your knife only when it’s necessary. Over-sharpening can wear down the blade faster.
Use Consistent Angles: Maintaining a consistent angle ensures that the knife’s edge is sharpened evenly.
Don’t Rush: Sharpening a knife is a precise process that requires patience and focus. Take your time for the best results.
Use the Right Tools: Not all knives need the same sharpening tools. Use a sharpening stone for a finer edge or an electric sharpener for speed.
Conclusion
Sharpening your knife regularly ensures it remains a reliable tool for various tasks. Whether you’re slicing vegetables, carving wood, or gutting game, a sharp knife will provide the precision and safety you need. While sharpening can be a learned skill, with practice and the right tools, you’ll be able to maintain your knives in top condition for years to come.
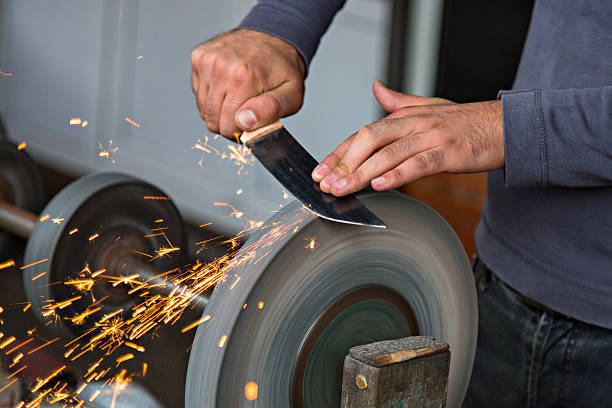
Sharpening the knife.
About PrimeDam
Welcome to the Prime Damascus Blog! Our team of enthusiasts and artisans is dedicated to sharing expert tips, care guides, and the fascinating world of handmade Damascus knives, swords, and axes. Explore the art, history, and craftsmanship behind our premium blades, crafted for collectors and adventurers alike.


 Kukri Knives